FOR TeacherS
How to set up Zoom for your classroom
The two most critical elements listed here are the Personal Meeting ID and the "Join from your browser" settings. Those two are listed here first and then the engagement tools are listed after. Please also read the recommendations from the Anti-Defamation League: How to Prevent "Zoombombing". They have some great resources about the security elements of how to get everything set to keep you prepared in case of any "trolls" or mischievous attendees.
If you're setting up Zoom for your classroom, we recommend using your Personal Meeting ID (PMI) as "your classroom", which anyone can join at any time, and separate meeting ID's for individual meetings.
Here are some steps and settings on how to do that. Be sure to also check out the 'For Presenters' page for some basic tips on audio, lighting, and video when webcasting.
First, download the Zoom app (Zoom Client for Meetings). It gives you much more control than running a session from the browser.
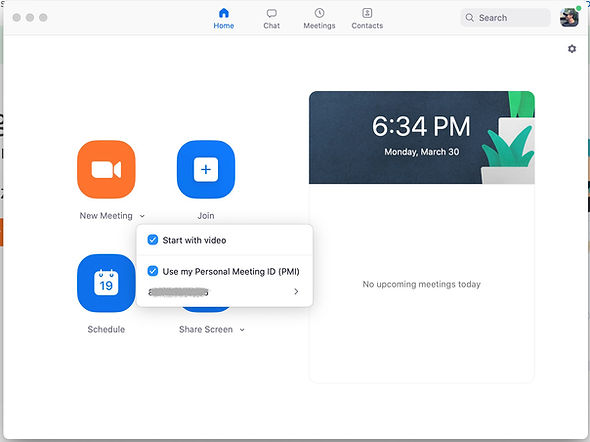
On the Zoom app, login to your account, then click the arrow next to 'New Meeting' and select 'Use my Personal Meeting ID (PMI)'. This PMI will be the link you email out to your students.
If you need to find your call in information, you can find it by clicking the 'Meetings' tab on the top center, then click your PMI on the left side. You will be able to see all the info for joining on the right.

Now for all the settings... Login to http://zoom.us, go to your 'My Account' page, and navigate to your Personal Settings:

Here, there are a few settings we strongly suggest toggling on or off, as shown. These will allow easier log in access for your attendees.
The first one is the most important so your attendees aren't required to download the Zoom app to enter your classroom:

Engagement tools
They get less critical from here down, but there are some great features you may want to take advantage of. Rules are meant to be broken, and these aren't even rules, so do with this what you will.
Breakout rooms allow you to split up your attendees into various sizes for "work sessions":

Muting upon entry will help so there's not chaos you need to quell at the start of every class. However, if you want to be able to create an environment where the attendees can socialize with each other before class starts, this option could be left "off" to promote conversation.

Polling will allow you to get feedback by asking questions and receiving answers. The more interaction you can put into your class, the more engagement you'll have from your attendees.

One more step with polling is to set up your polls. They can be recalled during your session, can have multiple questions in each, and you can save and share the results. Manage them by navigating AWAY from your settings, to: Personal > Meetings > Personal Meeting Room > Polls

Nonverbal feedback on zoom is another way for your attendees to interact with you by raising their hand or asking you to slow down, for example.

Even if you never look at it, you can track who is has their window open or not during class.

And there are many, many, many more preferences you can choose if you want. Be sure to also check out our For presenters resources page to learn a little more about the basics of audio, lighting, and video for the purposes of home webcasting.
Thank you for what you do, during this time and always!
Interested in a virtual commencement ceremony? Click here to learn more.